- Score along all folding lines. To score paper: use a black ball-point pen, preferably with a ruler, to make an indentation in the paper. This makes folding the pieces much easier, and results in a much nicer appearance.
- Cut the MAG instruments out along the outer lines. These instruments are assembled as follows:
- Fold the instrument on each black line toward the unprinted side.
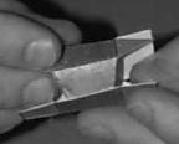
- Curl the bottom up towards the top, and apply glue to the lighter grey tab.
- Glue the tab to the bottom end, as shown below, and allow this to dry before proceeding.
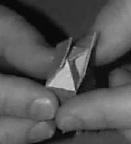
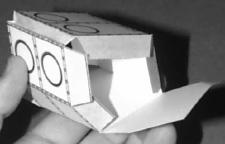
- Fold the tabs on the sides down, as shown below.
- Glue the side piece down onto the tabs, as shown below.
- You may now wish to send an emissary to Group One. This person can work with the person on their team who has assembled the MAG booms, as the instrument must be glued to the booms as shown below.
MAG -- Magnetic Field Monitor -- collects data on the sun's magnetic field, measuring the strength and direction of the interplanetary magnetic field 30 times per second, and calculates patterns of variations. MAG was developed by the Bartol Research Institute in Newark, DE, and by the GSFC, and is a flight spare from the WIND mission. For more information on MAG, please visit the web site at: http://www.bartol.udel.edu:80/~lheureux/ace.html
- SIS is a box like MAG, but with an extra face. As such, it's pretty easy to put together.
- Score along all the folding lines. This does not include the line between the wedge-shape and the printed faces at diagonal angles -- they are both part of the same face.
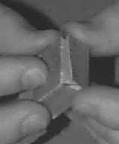
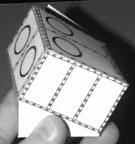
- Fold the model up as shown in the first picture below, so the bottom and top come together at the tab.
- Glue this tab into place, and allow it to dry before proceeding.
- Apply glue to the tabs on the sides (one side at a time), and fold the side pieces up. Glue the tabs into place so that the model takes the shape shown in the second picture below.
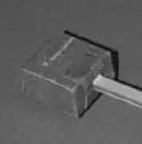
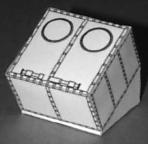
- The completed SIS model should look like the third picture below.
SIS was built to measure the elemental and isotopic composition of the solar wind, in the range of elements between helium and zinc. It was developed by researchers at Caltech, GSFC, and JPL. For more information on SIS, please visit http://www.srl.caltech.edu/ACE/CRIS_SIS/sis.html
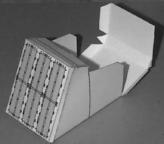
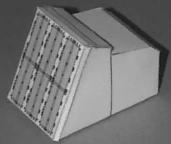
- SEPICA is constructed in much the same way as SIS; it's just a little more complicated.
- First score SEPICA along all the folding lines. This does not include the lines in between the panels sticking out from the middle face, or those on the face with the grid printed on it -- they are purely cosmetic. Do score along all the other horizontal and vertical lines, though.
- For this version of SEPICA, I forgot to put tabs on one key spot, as shown here at right: There should be a tab for that odd shape to attach to the gridded side, so before you cut this shape out, draw your own tab here.
- To assemble SEPICA:
- Fold all faces up towards the unprinted side
- Fold the gridded face back so that your hand-made tabs attach to the middle face, and the smaller tabs can be attached to the shorter side, as shown below.
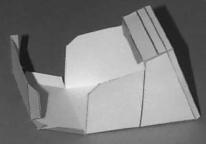
- Next fold the bottom side upwards, gluing those tabs in place (on the inside of the model) as you come to the faces they will attach to, as in the picture.
- Your completed SEPICA should look like the last picture in the series below.
SEPICA was built to measure the ionic charge state, elemental composition, and energy spectra of energetic solar ions. It was developed by researchers at the University of New Hampshire and the Max Planck Institute for Extraterrestrial Physics in Germany. For more information on SEPICA, please visit http://www-ssg.sr.unh.edu/sepicamain.html